Why not just use the provided MSI as-is?
My customer requires that all software runs with the lowest possible permissions—no third-party software should run as SYSTEM. I was asked to explore what could be done about Xearch.
Xearch runs as a Windows service on client machines and reports to the Xensam SAM platform. This setup gives the customer a comprehensive overview of their software, helping reduce the risk of failing licensing audits. By managing software continuously throughout the year, they also lower operational costs.
Creating the MSI Transform
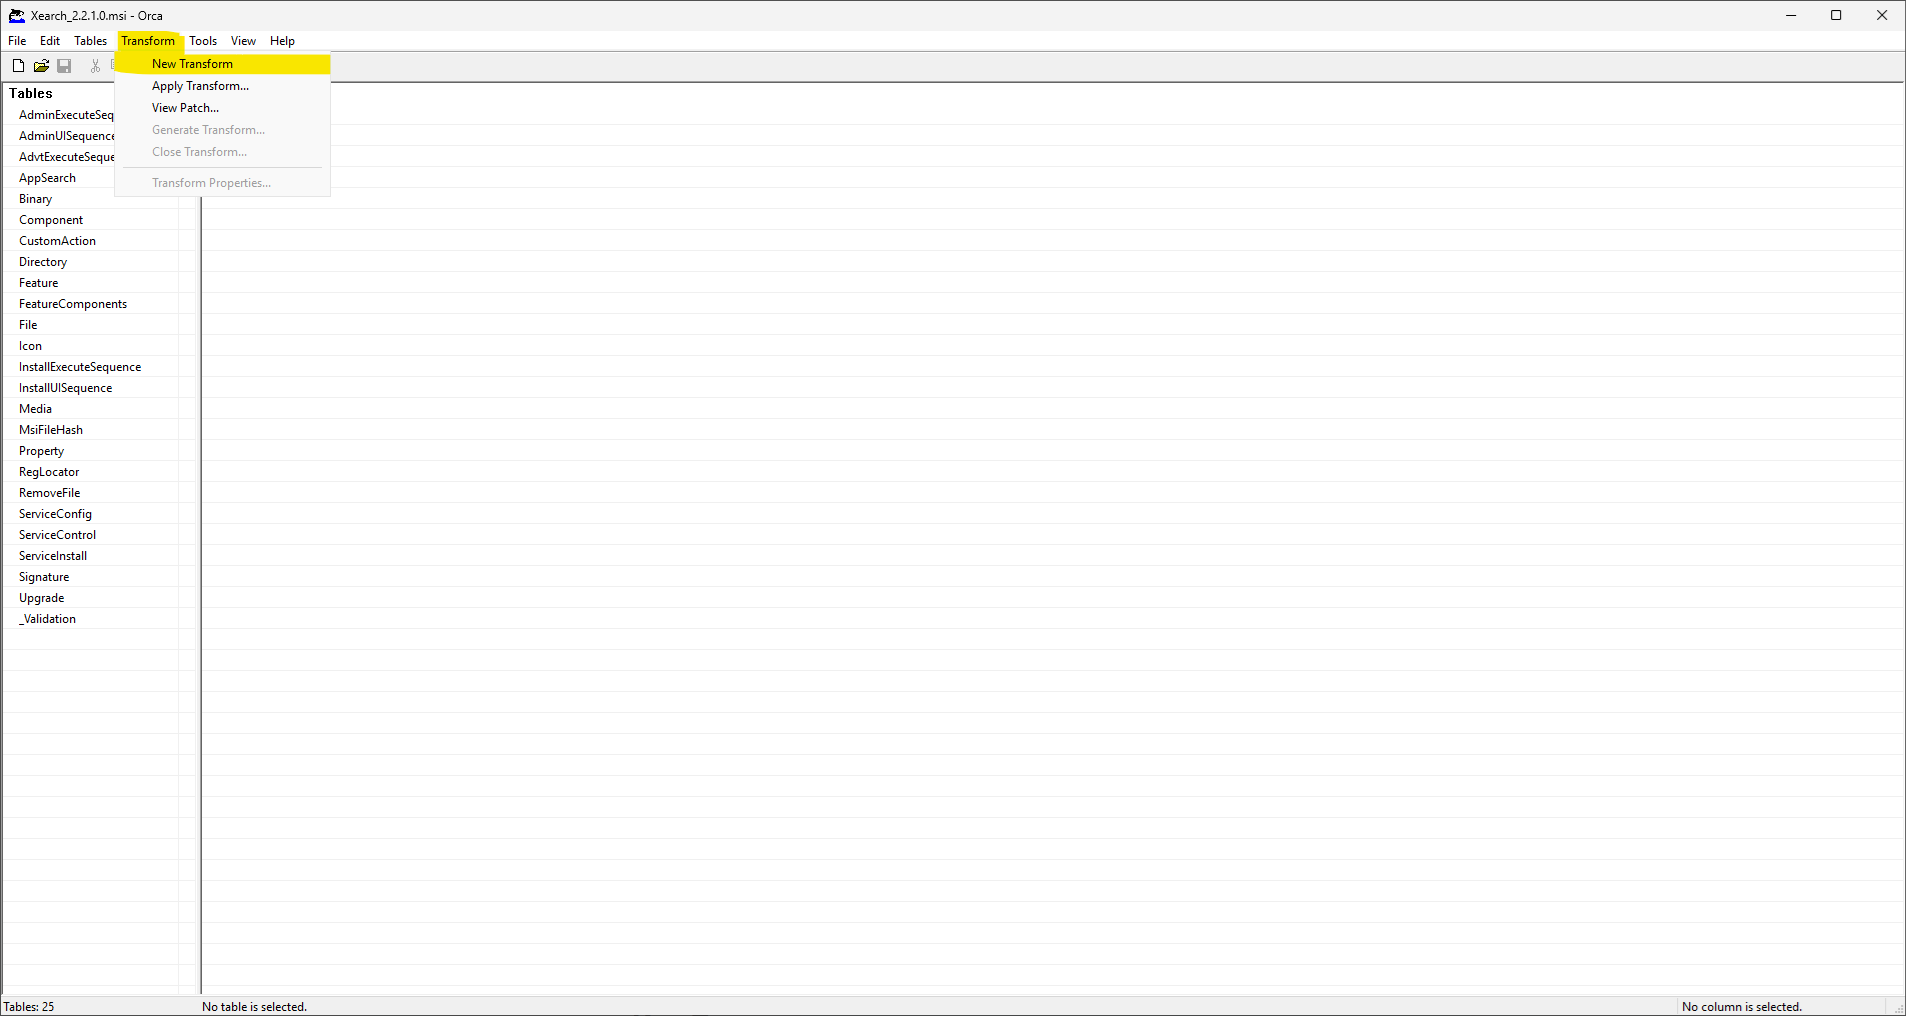
After opening the MSI in ORCA, begin by creating a new transform: click on Transform and then New Transform.
Adding the Required Tables
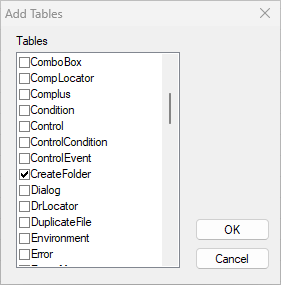
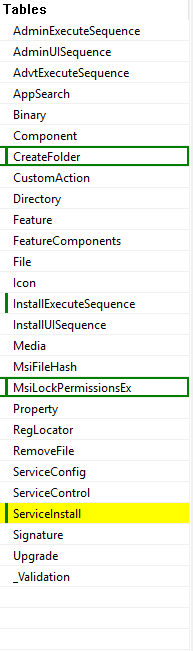
We need a few additional tables beyond what Xearch originally includes. Specifically, we’re adding CreateFolder and MsiLockPermissionsEx.
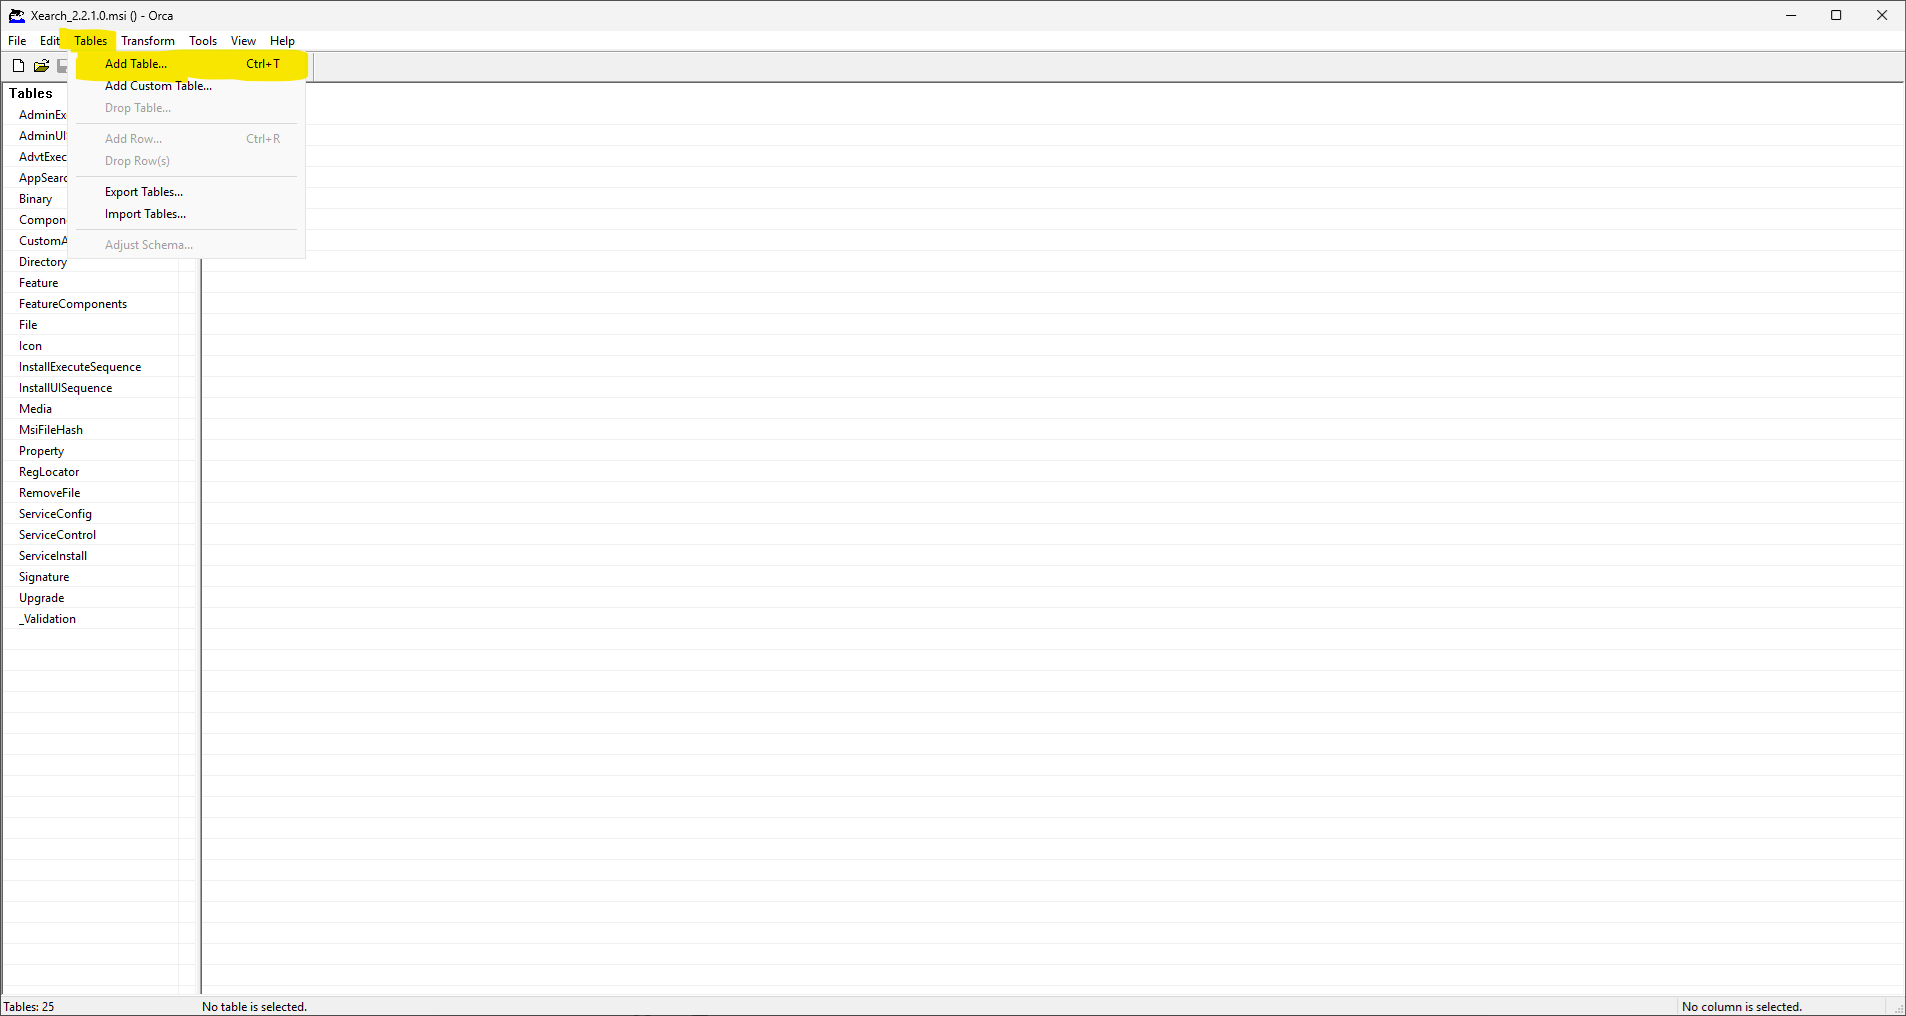
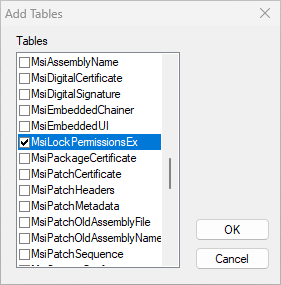
Start by selecting Tables, then Add Table.
Select CreateFolder and MsiLockPermissionsEx:
Updating the Tables
CreateFolder
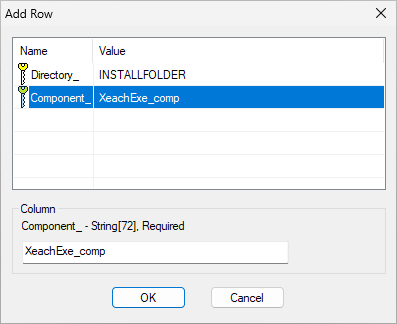
To set permissions, the MSI must first create the folder. Add a row to the CreateFolder table:
| Name | Value |
|---|---|
| Directory_ | INSTALLFOLDER |
| Component_ | XeachExe_comp |
MsiLockPermissionsEx
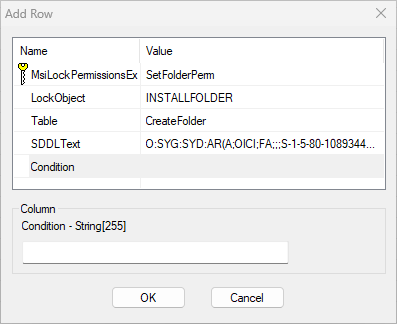
This is where the magic happens—we grant the NT SERVICE\XearchService account permissions to the installation folder. It’s crucial not to grant full control, as the binary may then alter permissions and break the folder. Instead, we assign Modify rights.
The SID S-1-5-80-1089344077-2353306179-4266717272-719476513-3025714595 corresponds to the NT SERVICE\XearchService account.
| Name | Value |
|---|---|
| MsiLockPermissionsEx | SetFolderPerm |
| LockObject | INSTALLFOLDER |
| Table | CreateFolder |
| SDDLText | O:SYG:SYD:AR(A;OICI;0x1301bf;;;S-1-5-80-1089344077-2353306179-4266717272-719476513-3025714595)(A;ID;FA;;;S-1-5-80-956008885-3418522649-1831038044-1853292631-2271478464)(A;CIIOID;GA;;;S-1-5-80-956008885-3418522649-1831038044-1853292631-2271478464)(A;ID;FA;;;SY)(A;OICIIOID;GA;;;SY)(A;ID;FA;;;BA)(A;OICIIOID;GA;;;BA)(A;ID;0x1200a9;;;BU)(A;OICIIOID;GXGR;;;BU)(A;OICIIOID;GA;;;CO)(A;ID;0x1200a9;;;AC)(A;OICIIOID;GXGR;;;AC)(A;ID;0x1200a9;;;S-1-15-2-2)(A;OICIIOID;GXGR;;;S-1-15-2-2) |
| Condition |
InstallExecuteSequence
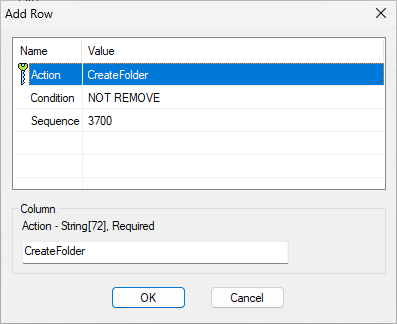
Next, we modify the installation sequence to include the new folder creation and permission settings.
| Name | Value |
|---|---|
| Action | CreateFolder |
| Condition | NOT REMOVE |
| Sequence | 3700 |
| Name | Value |
|---|---|
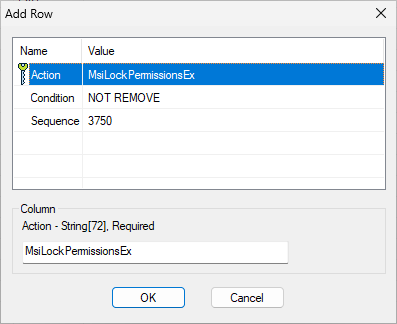
| Action | MsiLockPermissionsEx |
| Condition | NOT REMOVE |
| Sequence | 3750 |
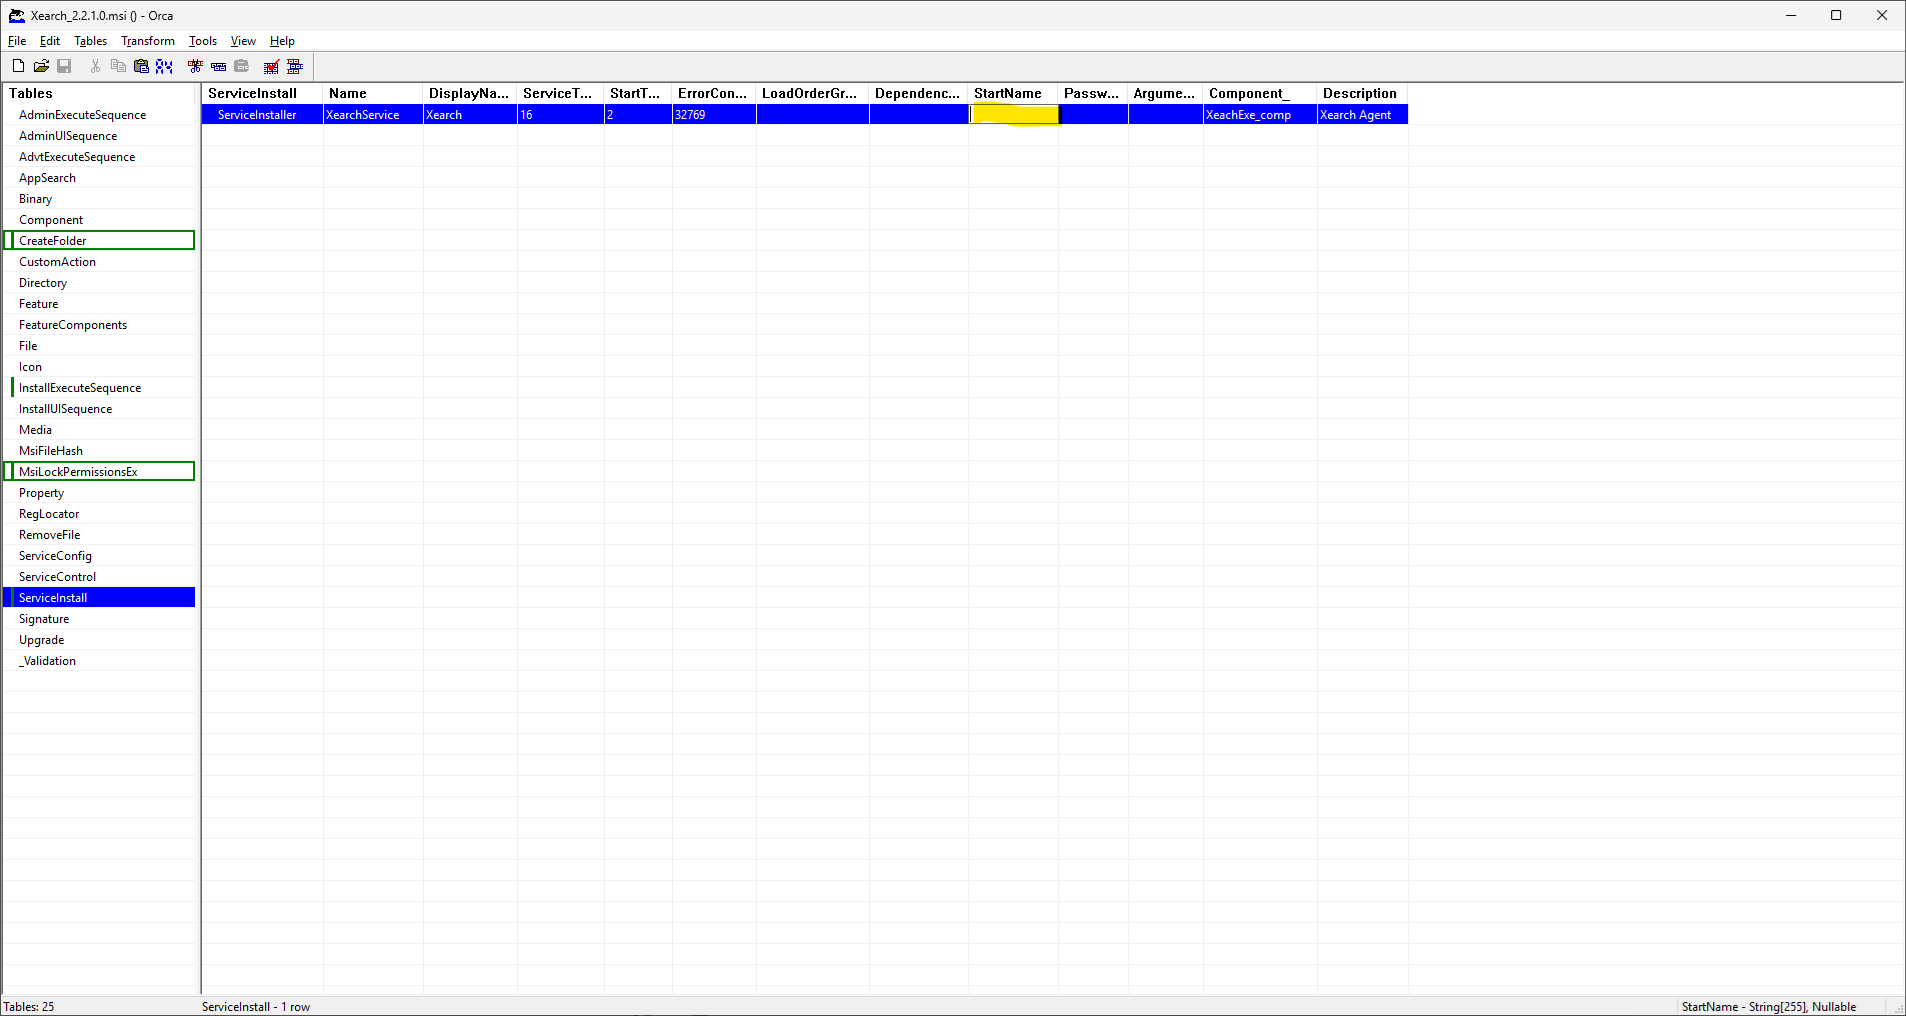
ServiceInstall
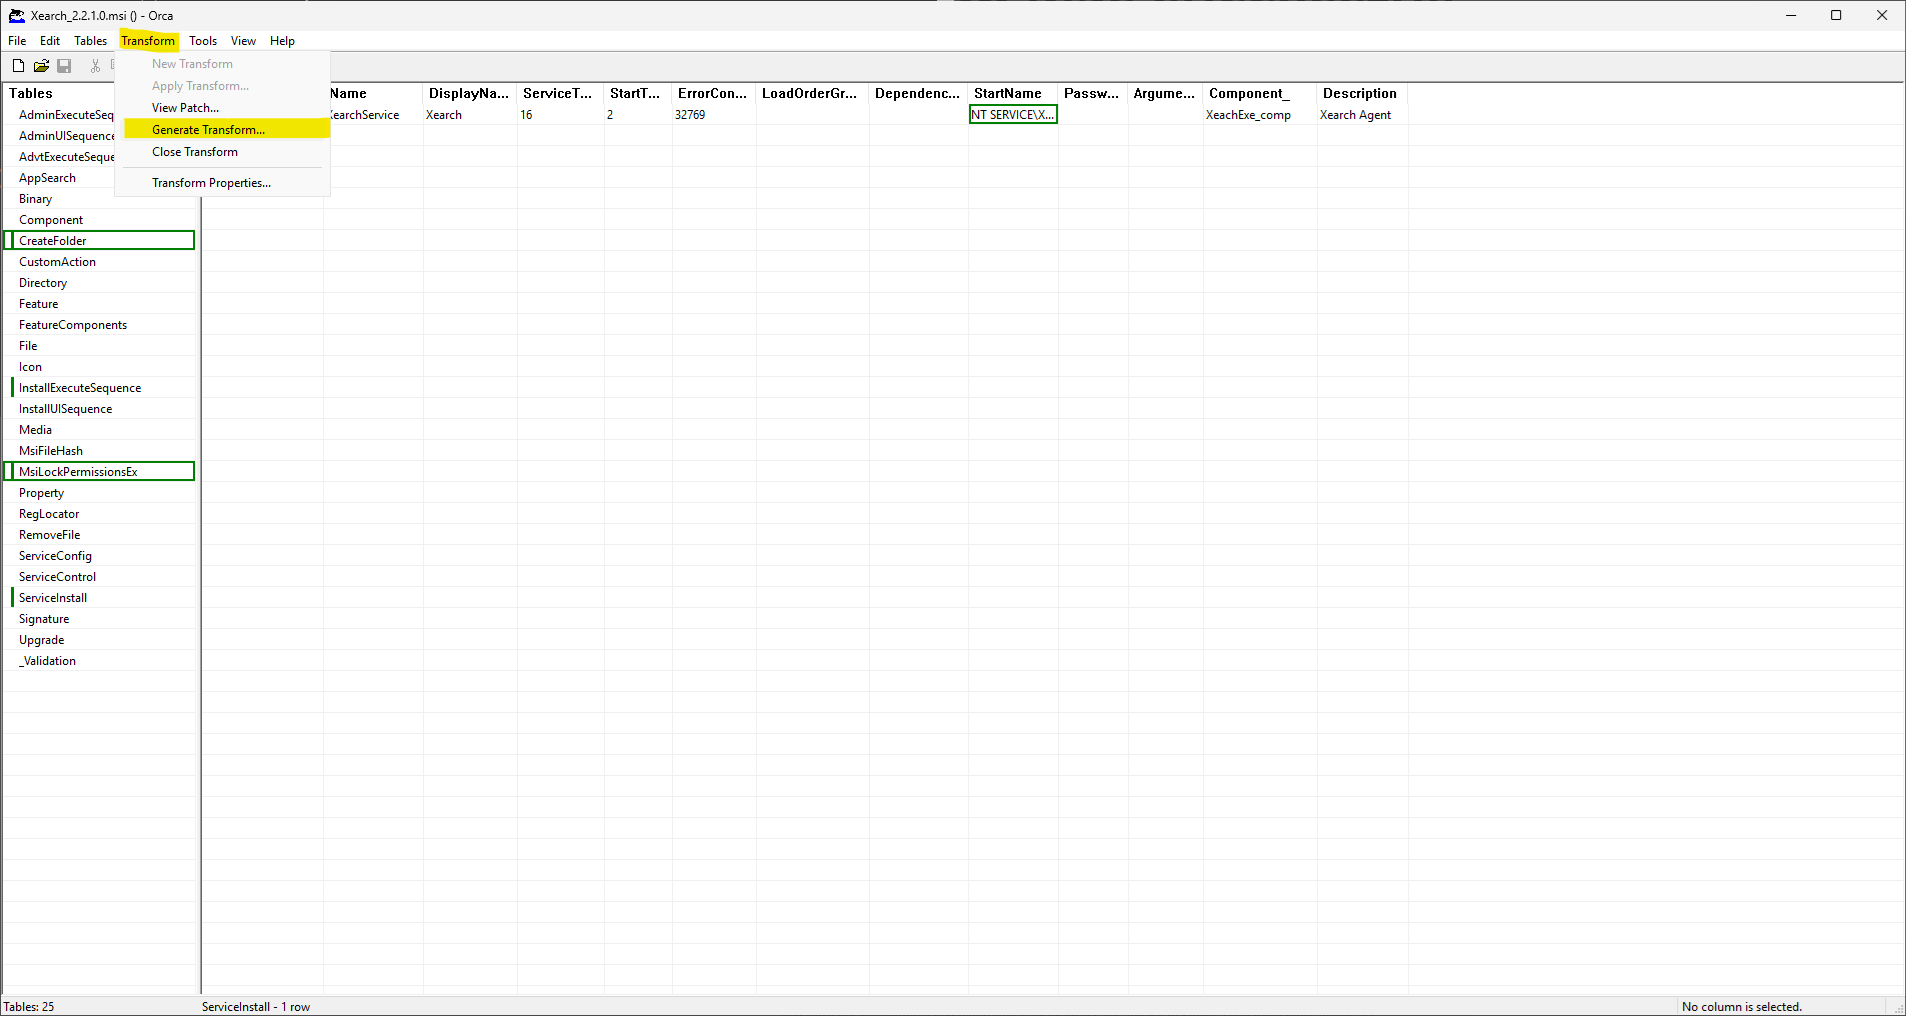
Lastly, ensure the service installs under NT SERVICE\XearchService instead of SYSTEM. Update the StartName accordingly.
Generate the Transform
You should now see the modified tables listed on the left.
Generate the .mst transform file by going to Transform → Generate Transform.
Test the MSI and Transform
You can now install the MSI with the transform to verify functionality. If your files are in C:\temp, the following command should work (adjust paths if needed):
msiexec /qb+ /i C:\temp\xearch.msi TRANSFORMS=C:\temp\transform.mstMSI Locked?
ORCA locks the MSI file, so remember to close ORCA before proceeding.